For deactivating and activating an entity using Altair Radioss, there are different approaches:
- Time to start and to stop
- Modify function curve
- Sensors
- Engine keywords (/BCS, /BCSR, /INIV) – Example for that:
In this article, we will present SENSOR, that is another way to activate and deactivate entities, and have some advantages compared to the ones listed above:
- The moment of activation is defined by meeting certain criteria, such as achieving the target force during a contact interface
- Activate and deactivate the sensor during the simulation
- Coupling different sensors with logical operators (if, and, or, sens)

The sensor is activated/deactivated based on the monitoring of a given entity, such as the time, the force in an interface or a section, the energy in a component, etc. Then this sensor can be used to activate/deactivate another entity (RBODY, IMPDISP, etc) or to stop the computation.
Sensor Definition
Entity that switches between activation and deactivation states depending on certain criteria. There are several options on Altair Radioss, for example: /SENSOR/INTER defines that when contact is detected, an object can be deactivated. For /SENSOR/TIME, it is possible to define the precise time in the simulation to deactivate the object.
Other types of sensors can be found at Altair Radioss help.
Sensors can be used to activate airbags, imposed forces, pressures, fixed velocities, rigid bodies, and other elements.
Example
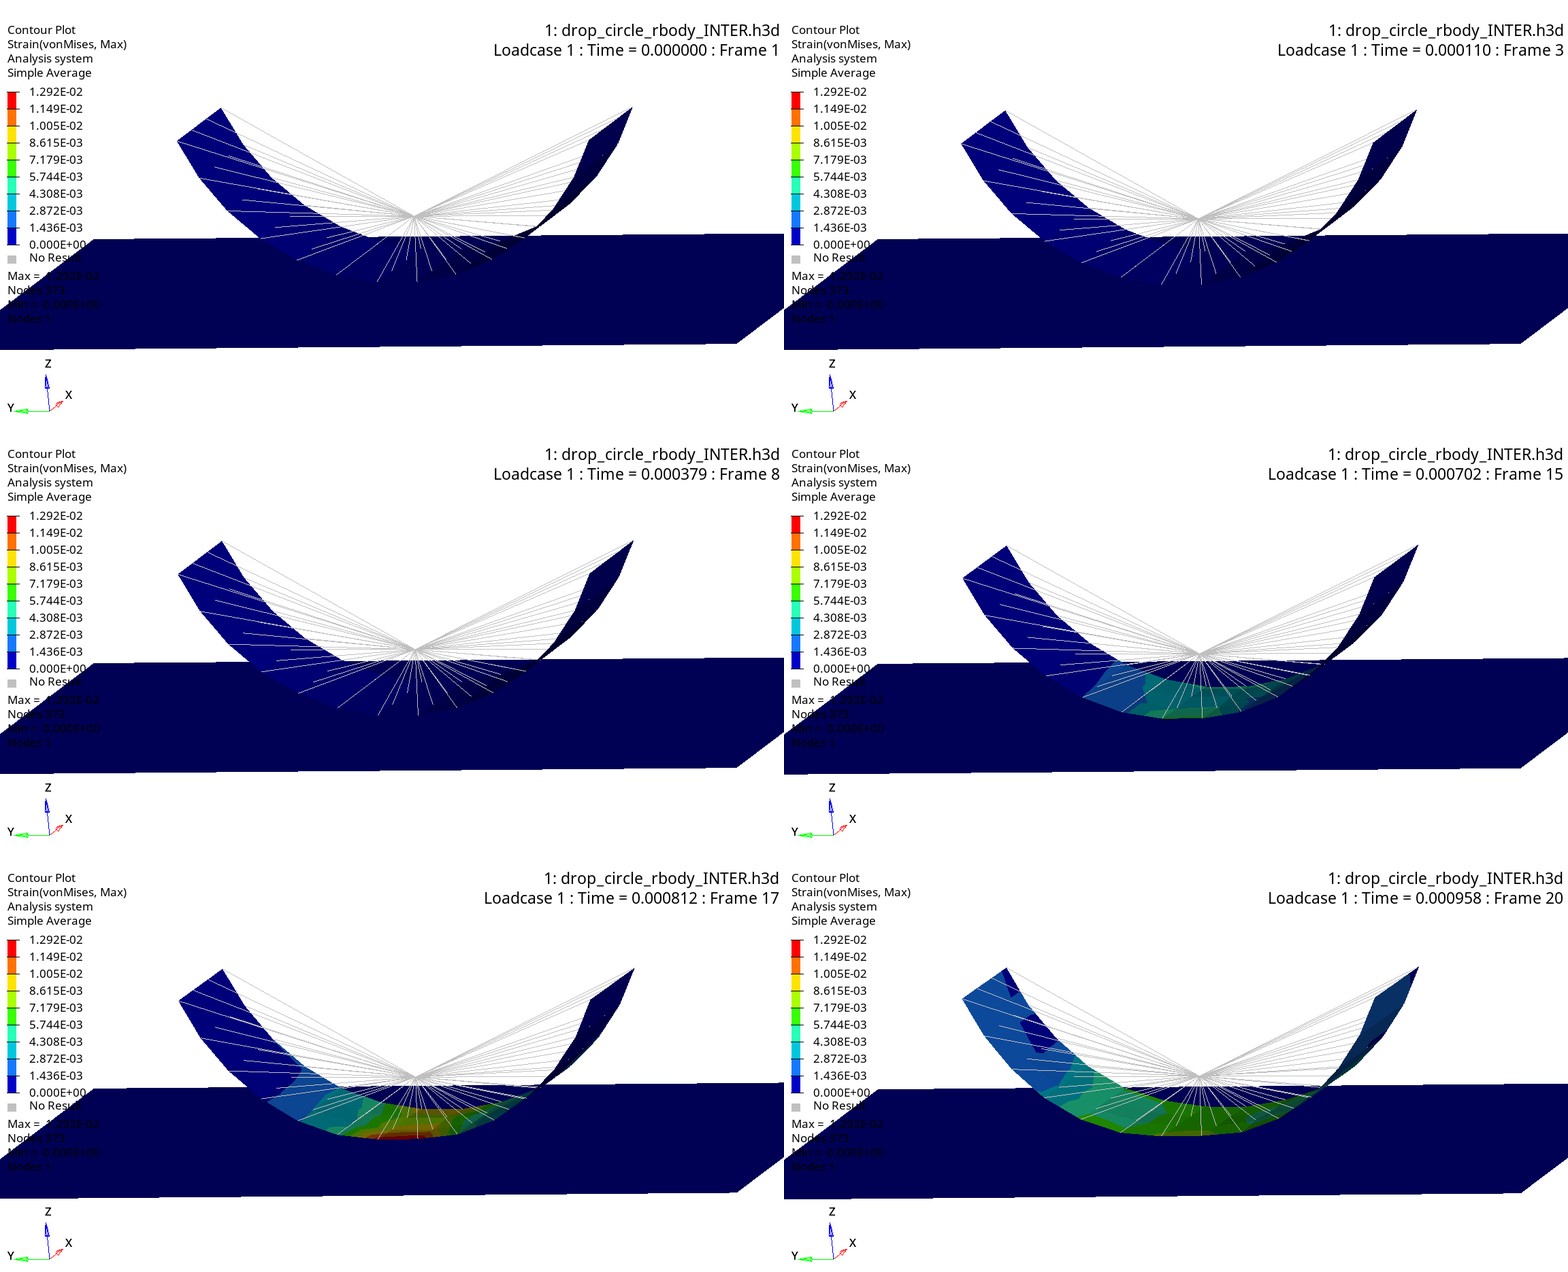
To exemplify the concepts, let’s set up a drop test for the object below. It is a semicircle made of polymeric material, which is given initial velocity (/INIVEL) and contacts the floor. A rigid body (/RBODY) connects all semicircle nodes, and we want it to be deactivated when the object hits the floor. For this purpose, we will set a /SENSOR/INTER.
To set up a /SENSOR/INTER, the most important information is to reference the contact that will trigger deactivation of the RBODY.

After defining the /SENSOR/INTER, you need to reference the sensor on the rigid body element that will be deactivated, in this case, the /RBODY:

Sensor Status
For monitoring the status of the sensor, a response output can be added as time history (recent feature, must be added manually).

For output results, 0 indicates that sensor is deactivated, and 1, activated.

Results
In the sequence below, we can see that until contact is detected, the rigid body is active. In the GIF, we see the moment when contact is closed, and the /RBODY is deactivated, allowing the object to deform until the end of the simulation. The last picture show the total strain after the drop and the sensor status along simulation.


The starter and engine files for this example are available. Additionally, other examples of activation/deactivation using /SENSOR/TIME and /SENSOR/RWALL are provided for better comprehension. Also, there is an example in the documentation that shows Sensors applied with logical operators:
https://help.altair.com/hwsolvers/rad/topics/solvers/rad/bicycle_jump_example_r.htm