Altair One Managed Licenses Guide – For Account Admin and Owners.
Every University needs to identify an Owner and an Admin who would oversee adding/removing users and handling of Managed licenses. In most cases students and faculty would self-register and be placed in the right account.
Adding Users Manually to the Altair One account: (Only accessible by Admin / Owner)
Click on Managed licenses > Manage Accounts > Users page to Add User.
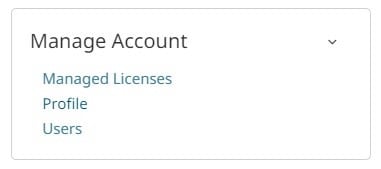
All the users who need to use Altair applications need to be added here

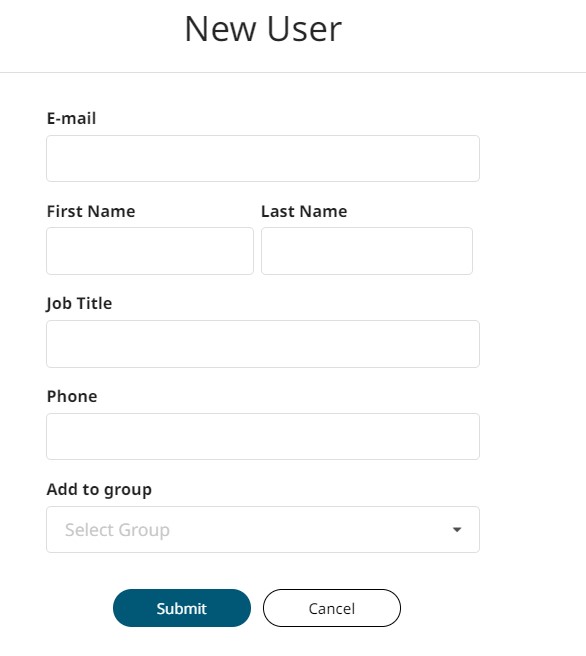
Click on Add user and enter the details of the new user, choose the group as applicable and also importantly choose user category “Verified Student” or “Verified Faculty” as applicable.
Adding User/s through CSV file
To add multiple users – Use Import from CSV option which has a .csv template > Enter the user details in the .csv file > Upload it
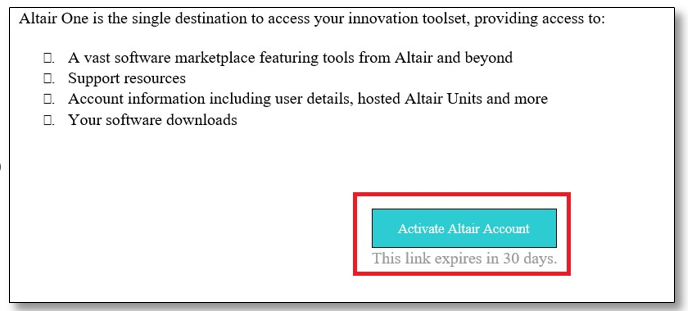
Once the Users are added, they will receive an activation link. The user needs to activate their AltairOne account using that link.
Deleting Account:
User Deleting their own Account: Users Can Delete their account from User Profile > Delete My user Account.

Admin Deleting User Account: Go to Users Page and select the below Icon to delete a user.

Advanced Usage and management of the Altair One Managed licenses Account:
License Priority:
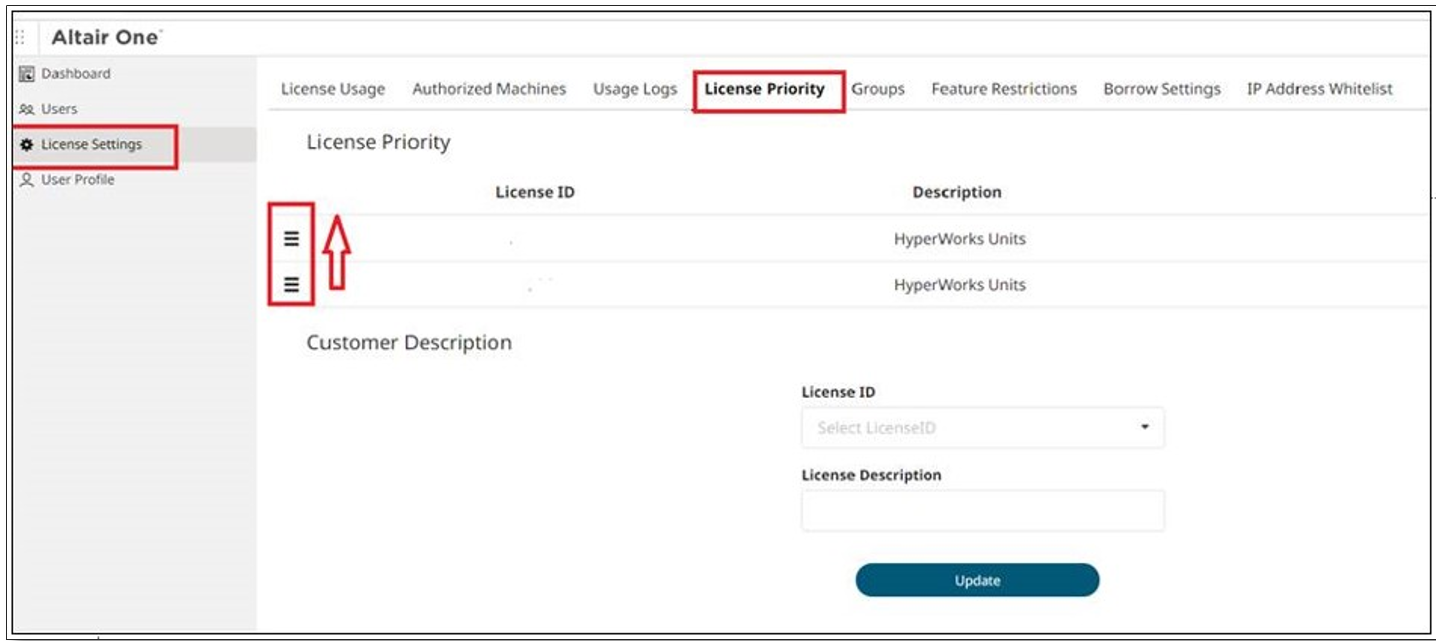
In case of multiple licenses, priority of the license from which tokens can be first picked up can be set.
Click and hold the highlighted icon to change the priority.
Go to License Priority in the License settings tab, hold the burger icon and toggle the Licenses to place them according to your requirements.
Creating Groups is useful in the following Scenarios:
- With multiple users, there could be only a few users who would require access to the Managed licenses.
- With multiple licenses and multiple departments or teams, a different license needs to be accessed by each team.
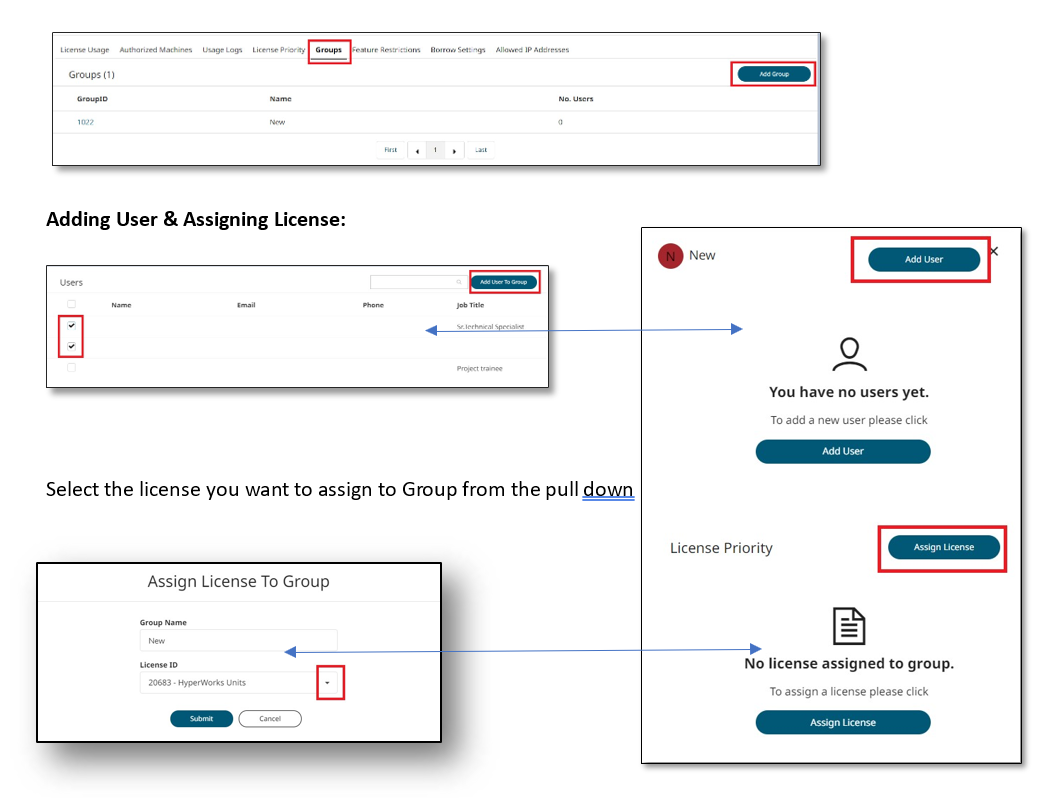
In these cases, a group/s can be created and once the users are added and a license is assigned to the group, the users in it would only be given access (to all the features in the license) When users are added to Multiple Groups, they have access to multiple licenses.
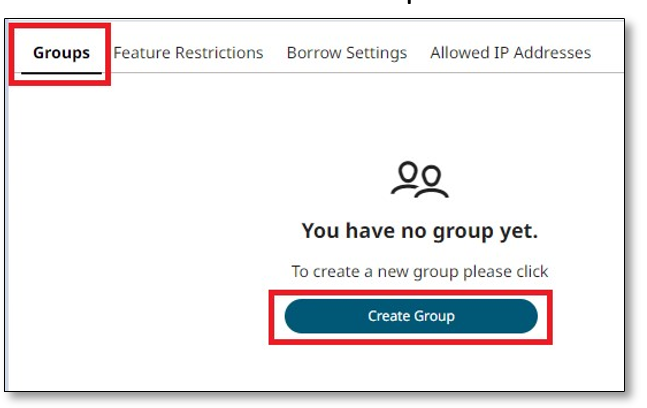
Creating and Adding Groups:
- Click on Create Group to Create the first Group
To Add Multiple Groups:
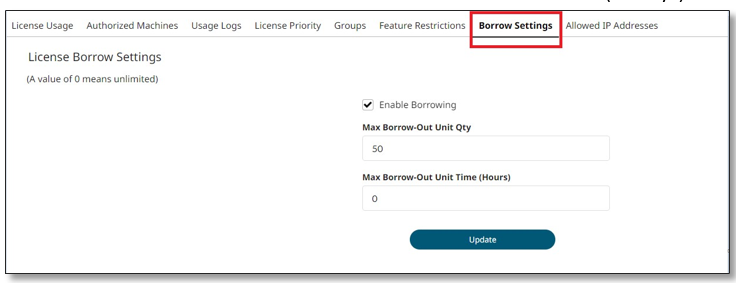
Borrow Settings:
- Admin has the privileges to Enable/ Disable Borrowing for their Organization.
- The admin can set the Max Number of tokens and Hours that can be borrowed by any individual user.
- The licenses can be borrowed for a Maximum of 336 hours (14 days)
Feature Restrictions:
A license will have Application features that allow Users to access the suite of Altair products requested by the customer.
• Feature Restrictions are added to enforce a LIMIT for the utilization of available Altair Units or Application Features for the users.
Example: HWHypermesh, HWOptistruct
This setting is available for Users with Altair One admin credentials only.
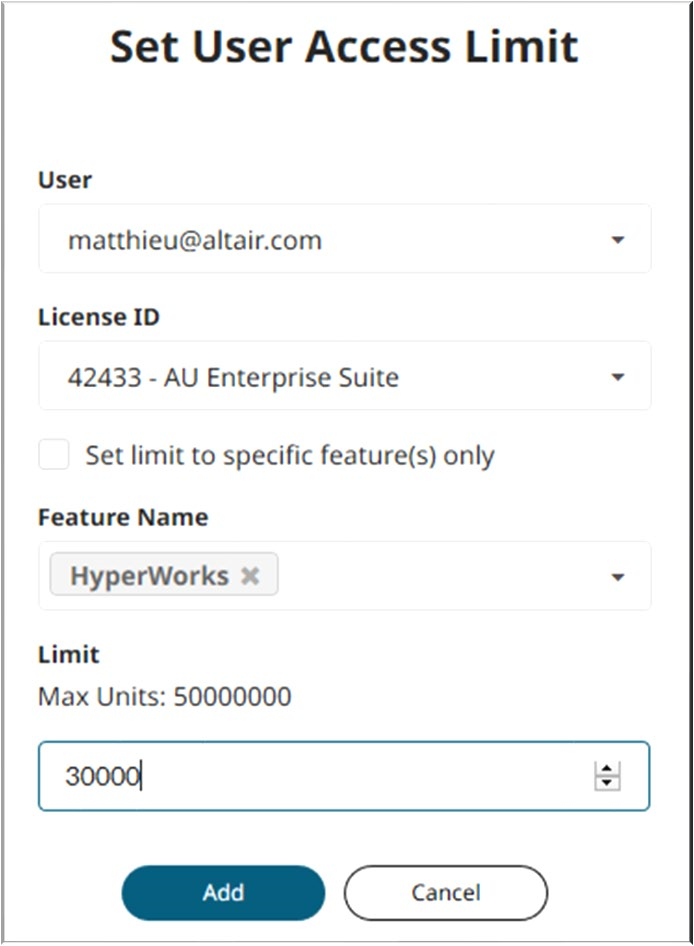
The Admin can add certain restrictions only to individual users with – Set User Access

Access Limit:
Select the User and license ID on which the restrictions need to be added.
You can limit the user only to the features listed under Feature Name by checking Set limit to specific feature(s) only.
Example: Checking Set Limit to Specific feature(s) only with HWHypermesh, HWHyperview selected under Feature Name gives the user access only to these application features. They will not be allowed to use other features from the selected license.
Enter the features to which the limit applies under Feature Name.
Enter the limit for the selected features. Keep in mind that this is counted in license features, 1 Altair Unit = 1,000 license features.
Example: To prevent a user from consuming more than 30 Altair Units, enter a limit of 30,000.
Feature Restrictions:
The Admin can remove restrictions on individual users with – Clear Limit

Select the User and license ID on which the restrictions need to be removed.
