Learn how to accelerate your power converter design with automated design exploration using PSIM and HyperStudy. This tutorial walks you through linking the two tools to optimize system parameters and analyze their impact on selected Key Performance Indicators (KPIs).
For this workflow, you will need to install:
- PSIM
- HyperStudy
- Compose (optional) — it is used to convert PSIM’s
.smv output into a .abf format that HyperStudy can read via its "File Explorer." Without Compose, you’ll need to manually save results as .txt files (see video tutorial below at 3:50).
Note: .txt files are larger since they aren’t binary. The.smv&.abffiles are binary.
Note: It’s mandatory to use the same version of Compose and HyperStudy (e.g., 2025.1) to ensure full compatibility and .abf file creation. Using the same version of PSIM is also recommended.
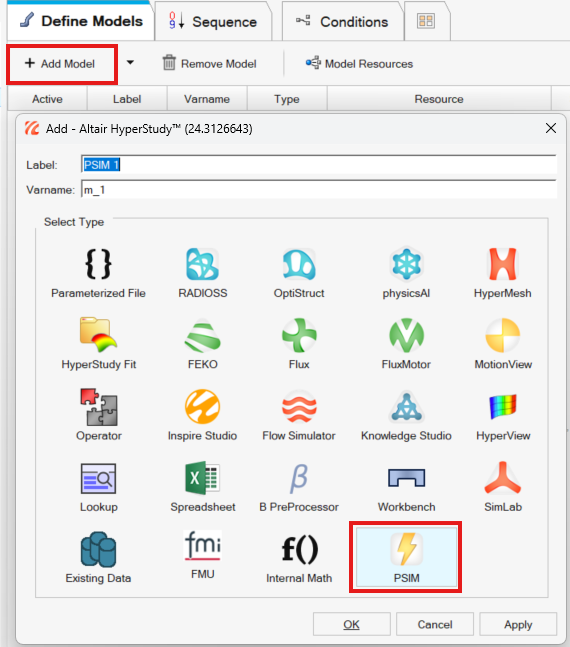
*Before watching the tutorial video, please ensure that the PSIM-HyperStudy connector (introduced in PSIM v2024.1) is installed via the "Utilities » HyperStudy Setup" option in PSIM.
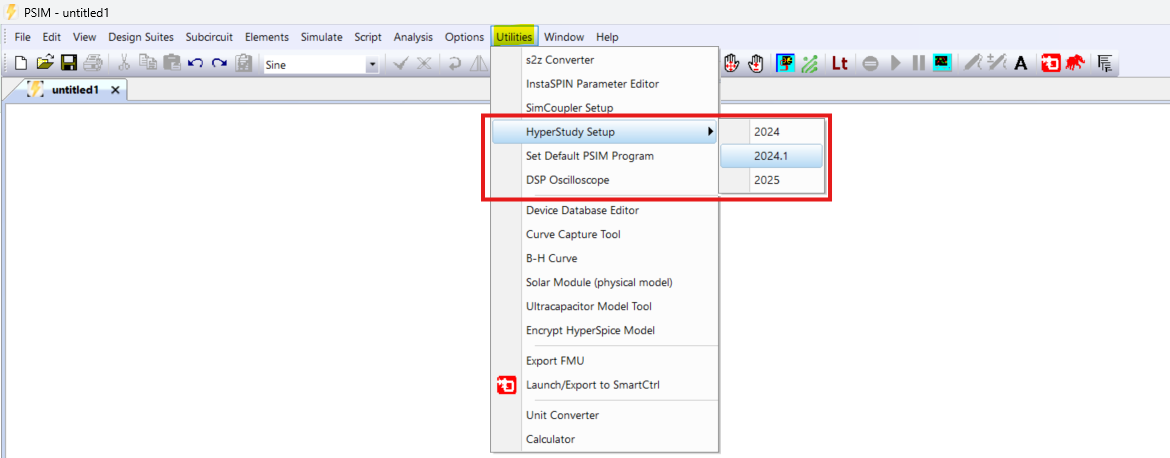
This step will enable the PSIM icon inside HyperStudy:
———————————————————————————————————————
To avoid common issues, please be mindful of the following regarding the HyperStudy study file path:
1. Avoid using OneDrive or Google Drive file paths. Please use a local disk instead.
2. Ensure you have edit rights to the file path.
3. Make sure that the path name and study folders do not include special characters, and that the path length is not excessively long.
———————————————————————————————————————
Once the connector is successfully established, you can proceed with the step-by-step tutorial. You will find the tutorial files at the bottom of this article.
Tutorial Files
Relevant links: