This article explores how to automate LTspice using HyperStudy. The first step is to configure the LTspice solver within HyperStudy.
LTspice solver set up
In order to set up the LTspice solver you have to follow the following steps:
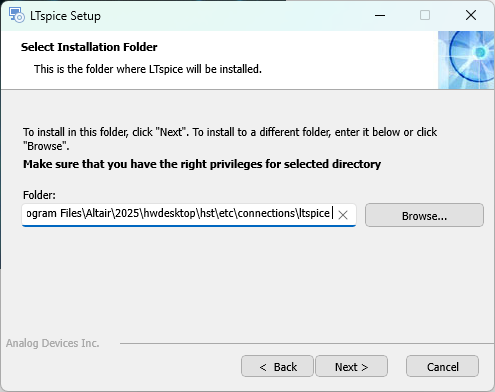
- Unzip the attached ltspice.zip file to the following directory
C:\Program Files\Altair\2025\hwdesktop\hst\etc\connections
If you use a Hyperstudy version different from the 2025 one, unzip the folder to the corresponding directory - Open the preference_study.mvw file which is located in the C:\Program Files\Altair\2025\hwdesktop\hw\prefinc path. Write the following command in BeginConnections( ) part of the code.
*RegisterConnection({getenv("ALTAIR_HOME") + "/hst/etc/connections/ltspice "})

- Open Hyperstudy and click on “Register Solver Script” on Edit Tab
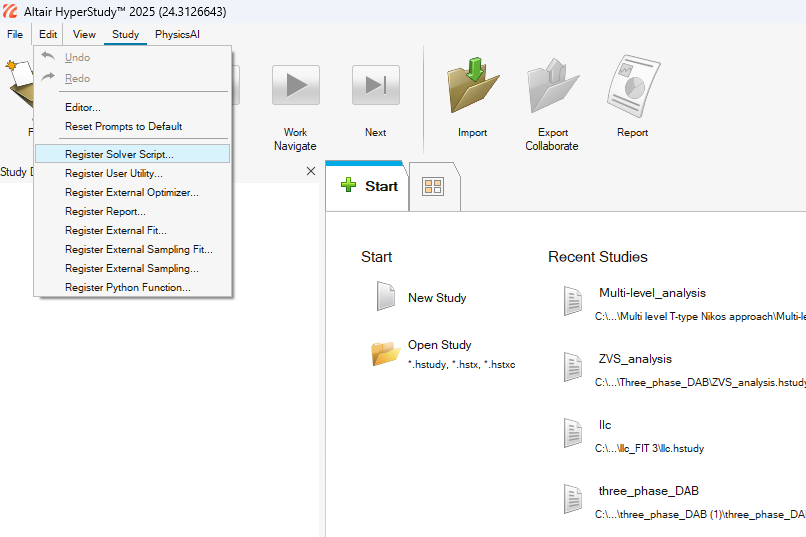 In the window that appears, add an LTspice solver
 When you add the solver, type or browse the LTspic.exe file location and click OK.
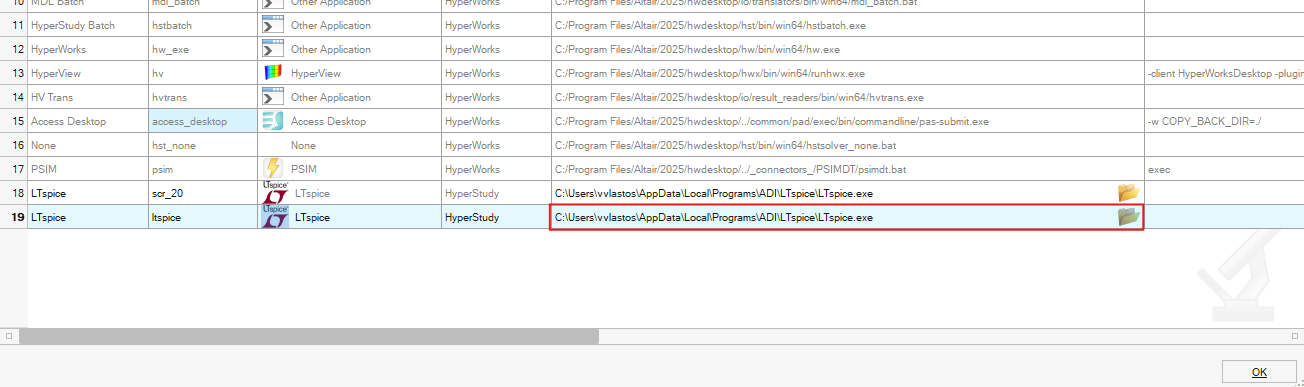 After these steps, you should restart Hyperstudy.
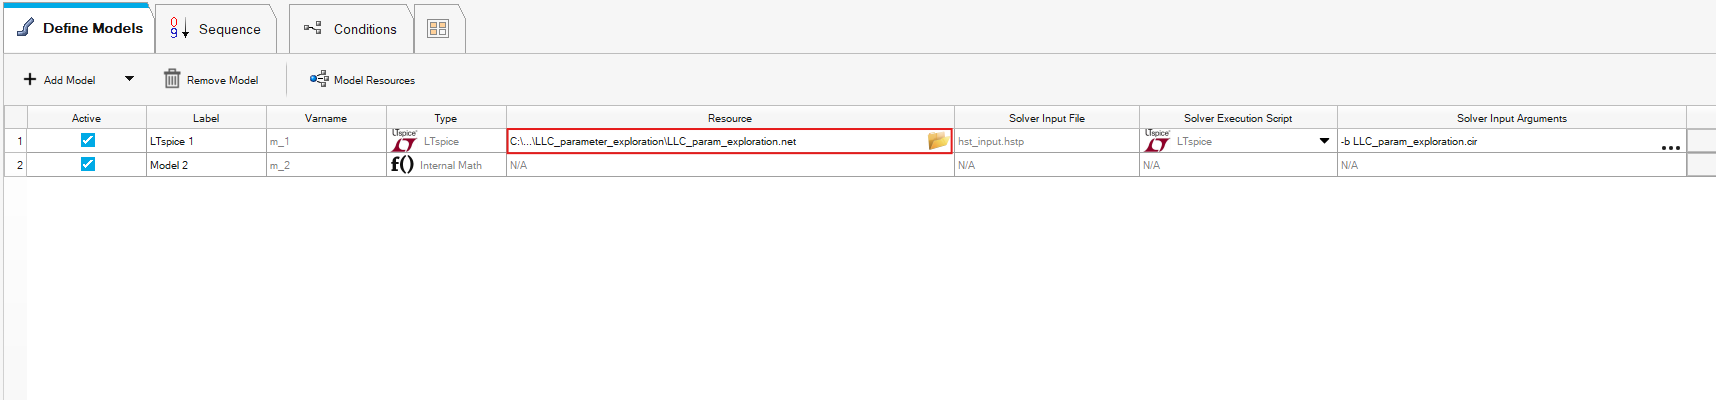
- If you complete the previous steps, you are ready to work with Hyperstudy. If you have not experimented with Hyperstudy before, you should read an article here. Then, you the should add the LTspice model and import the .net file linked on your LTspice circuit you want to make an analysis on.
- At this stage you must open and run the LTspice simulation in the background.
The process will not function unless LTspice remains open and running in parallel.
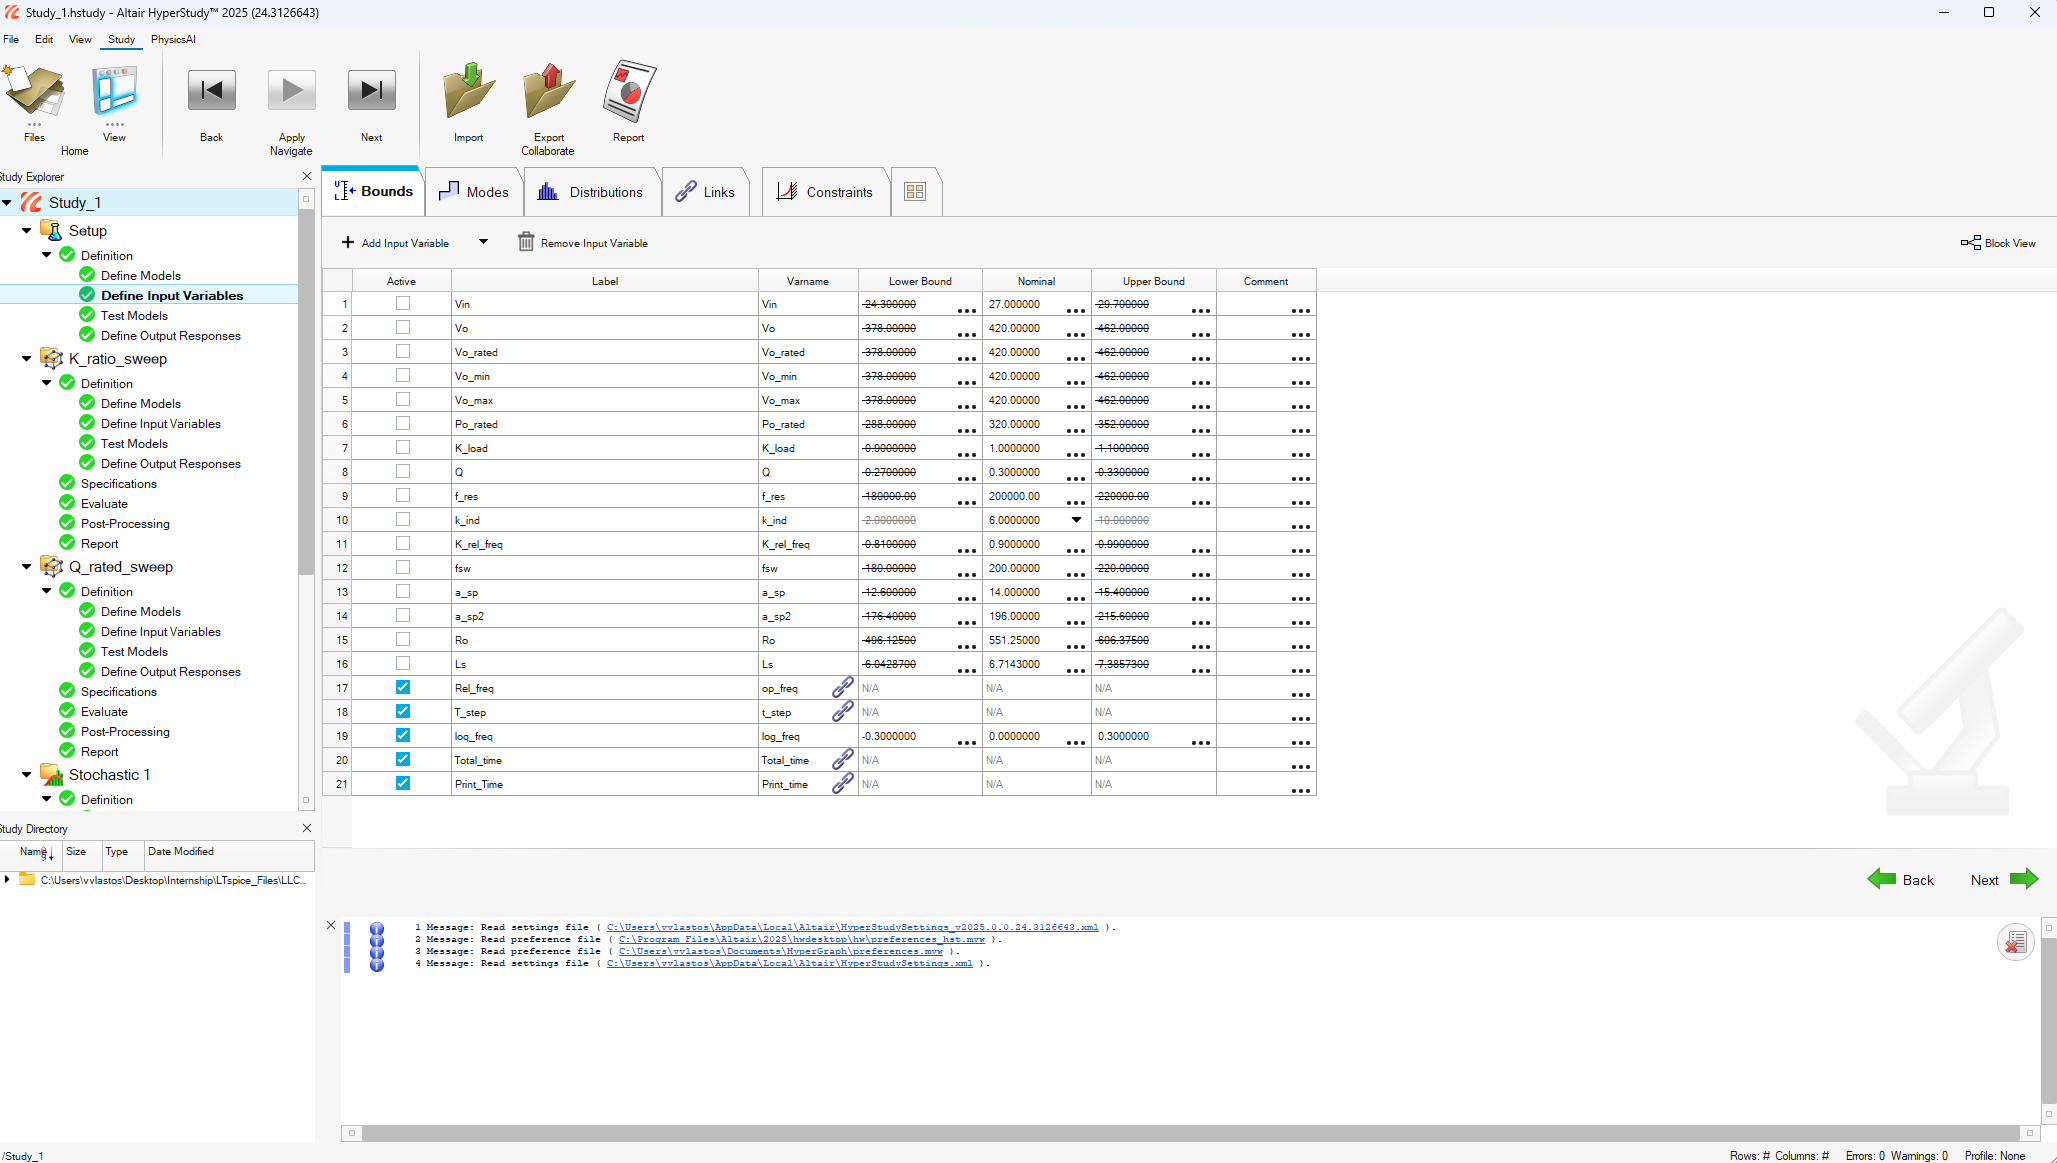
Once this is set up, click on the "Import Variables" button to automatically import all the parameter.

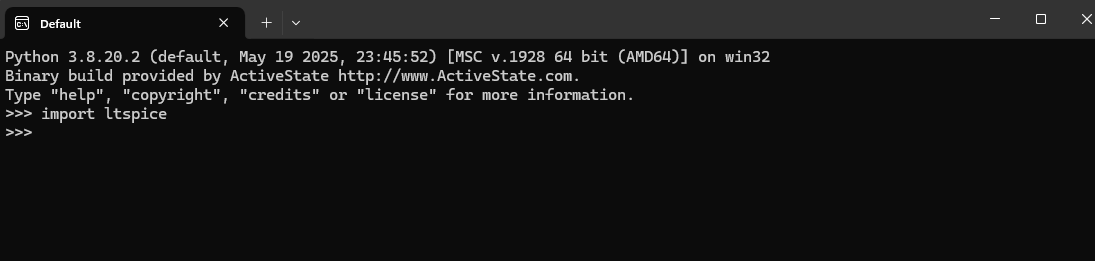
- Another challenging aspect of using HyperStudy with LTspice is data source extraction. To enable this functionality, specific LTspice-related modules must be installed via the Windows Command Prompt for the Python version bundled with HyperStudy. In HyperStudy 2025, this version is Python 3.8 specifically located and bundled with the Altair\2025 folder. With each new Hyperstudy version you will need to install the LT spice python module again in the corresponding version folder
cd C:\Program Files\Altair\2025\common\python\python3.8\win64
python.exe -m pip install ltspice==1.0.5
- Ensure that the ltspice library is installed by opening python 3.8 and importing the libraryas shown at the following picture
- Next step is to extract the data source we need for our analysis, and here is the reason we need to use a python script
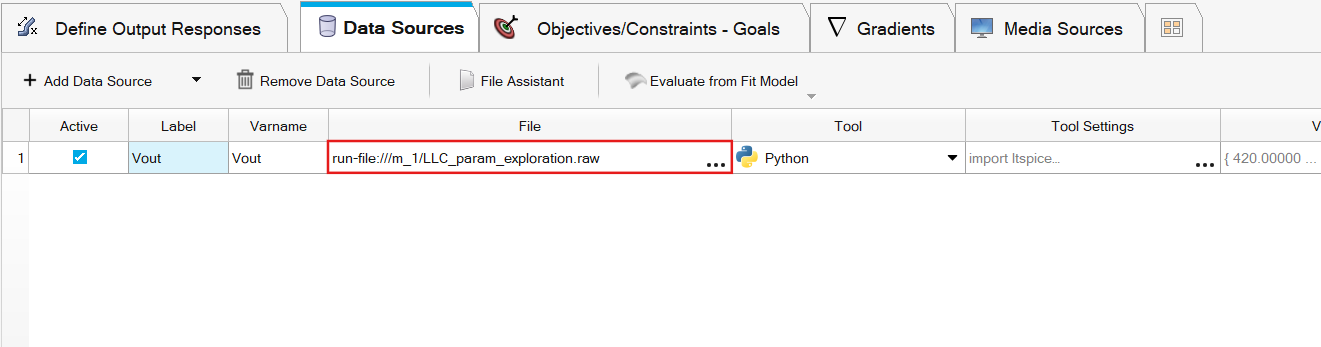
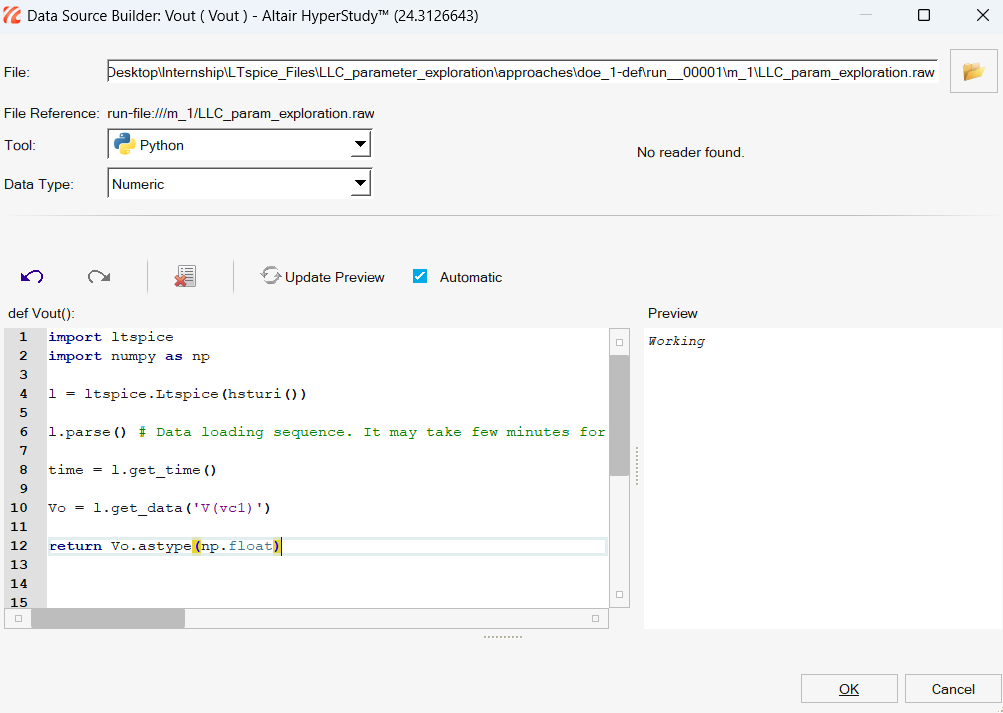
This script returns the Vo from the data included in the .raw file.
- The next steps are the same with any other type of model and you can get tips and advices from the article I mentioned at the top of this page.
LTspice vs PSIM
Using LTspice with Hyperstudy can be more challenging, as it doesn’t offer full automation—you’ll need to write your own scripts to extract the results. It’s also considerably slower than PSIM. While that might not matter for just one simulation, it becomes noticeable over a full analysis. In my case, running 200 LLC converter simulations took around 25 minutes longer in LTspice compared to PSIM.
Uploaded files:
The following file is the one that was mentioned at the first step, and it is required for the LTspice & Hyperstudy connection
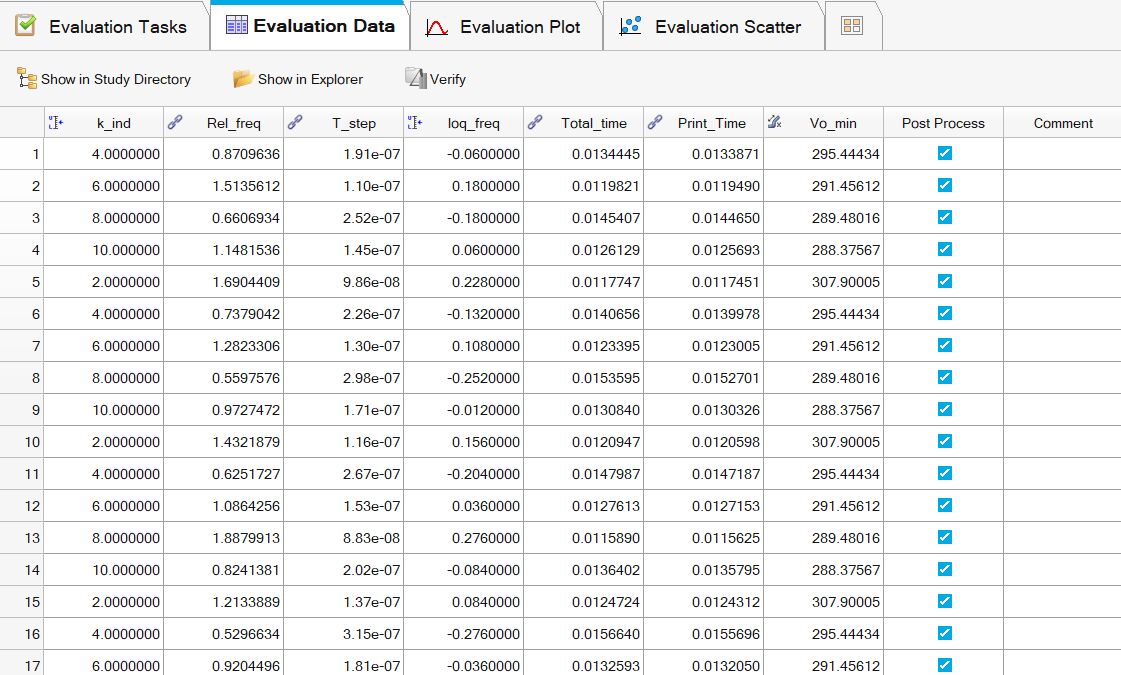
Moreover, we implemented an example regarding the LLC parameters exploration of a Resonant Converter, and it can be found at the following .zip file.