This guide aims to demonstrate how to install the Python API and run a PSIM simulation using Python.
Altair Compose Installation
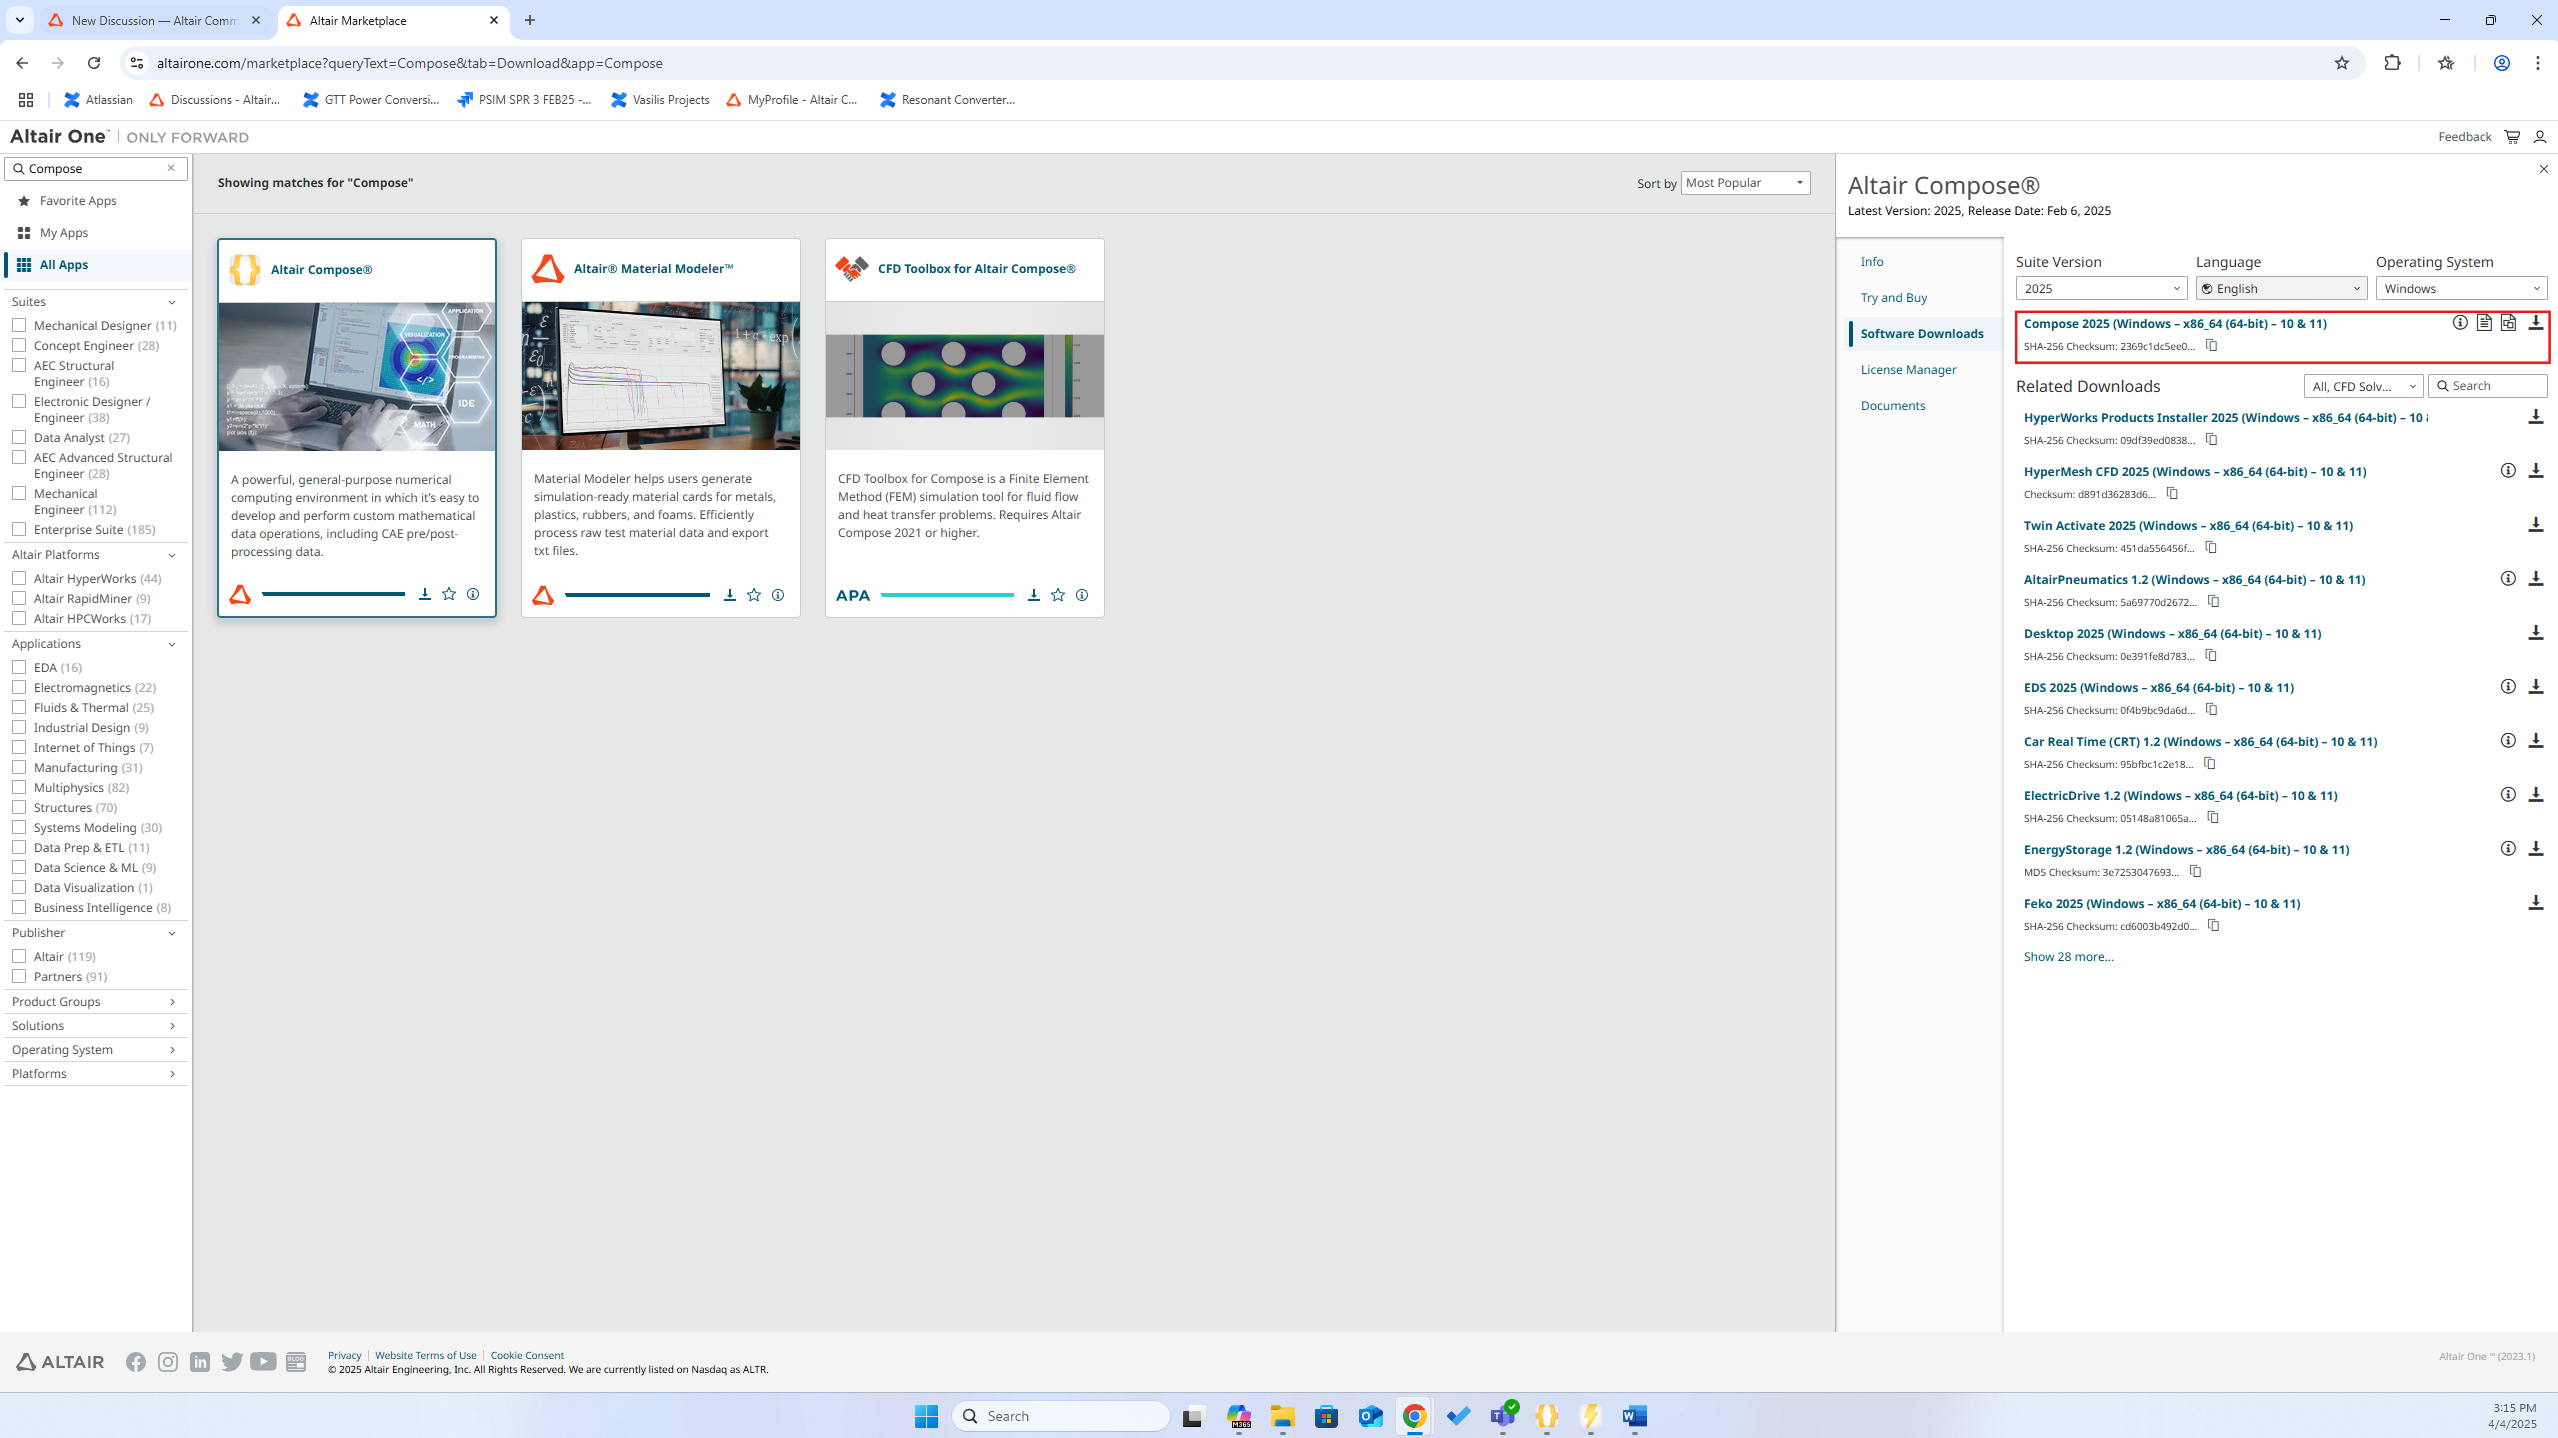
First, download the Altair Compose Software from the Altair Marketplace
and install it on your computer.
Altair Compose is a numerical computer environment in which it’s easy to develop and perform custom mathematical data. So, it can be used as an editor instead of any other development environments like VScode. When Compose is installed, Python will be automatically installed and it will be located at:
C:\Program Files\Altair\2025\common\python\python3.8\win64\python.exe
PSIM’s Python API Installation
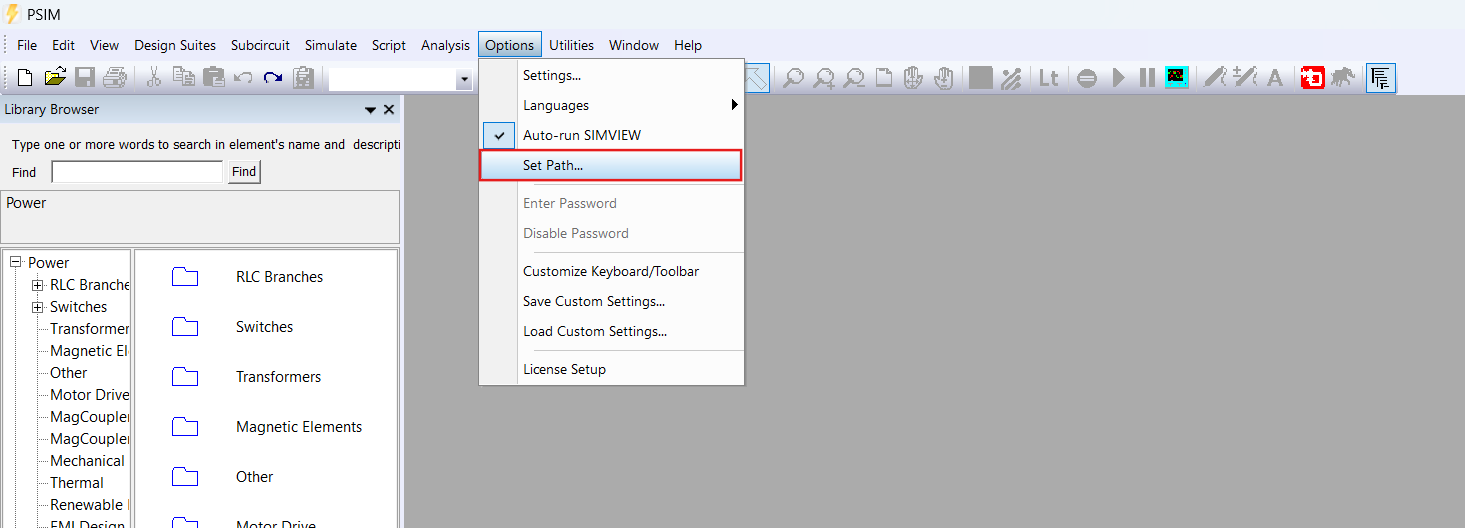
Next, install PSIM’s Python API. Open PSIM and navigate to Options > Set path
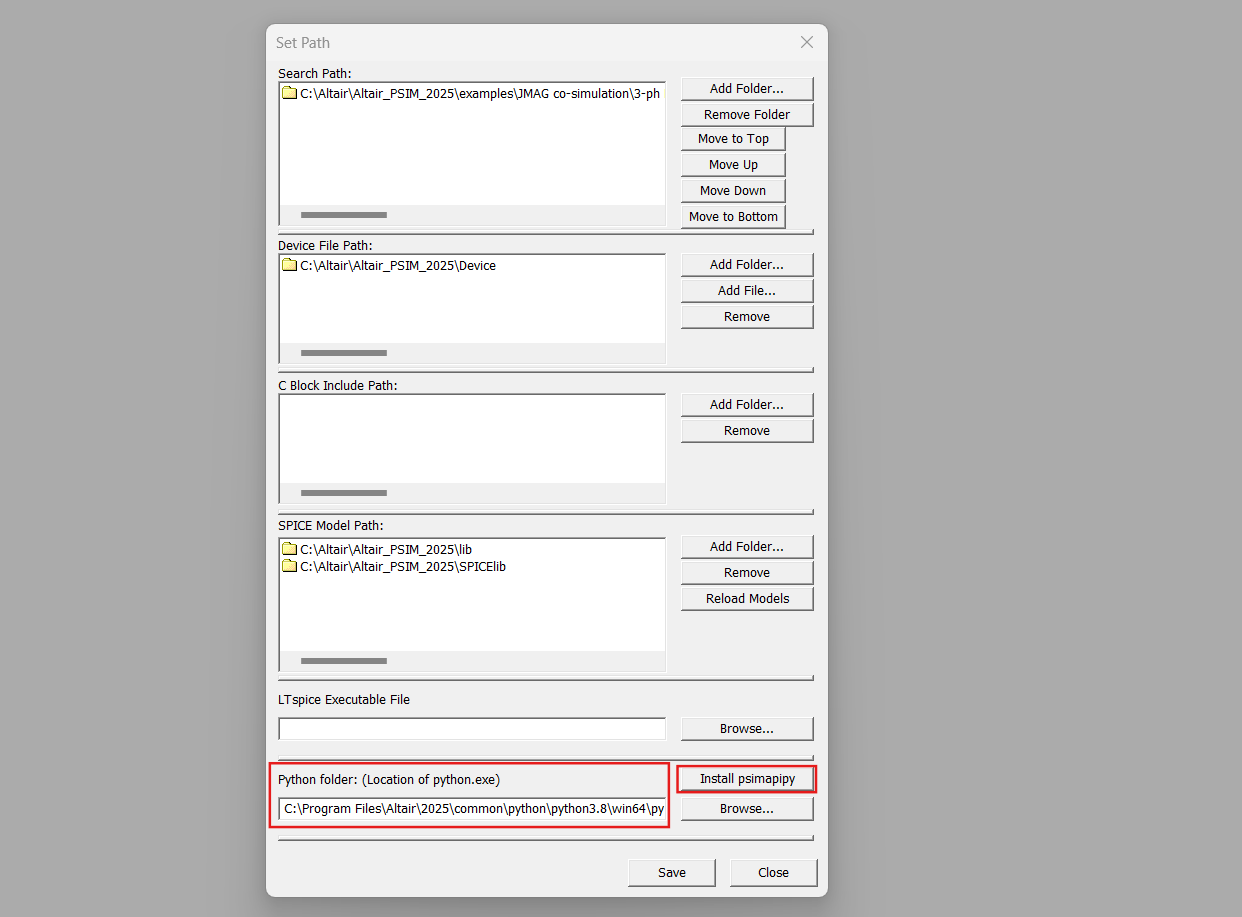
After this, you have to enter or browse to the Python executable directory:
C:\Program Files\Altair\2025\common\python\python3.8\win64\python.exe
Click the ‘Install psimapipy’ button to install PSIM’s Python API.
After completing these steps, you will be able to run Python scripts to execute PSIM simulations.
Python Samples
When you download the PSIM software, it includes Python samples located at:
C:\Altair\Altair_PSIM_2025\Python\Samples
These samples demonstrate how to use Python code to run simulations, save, and open .smv files.
Example
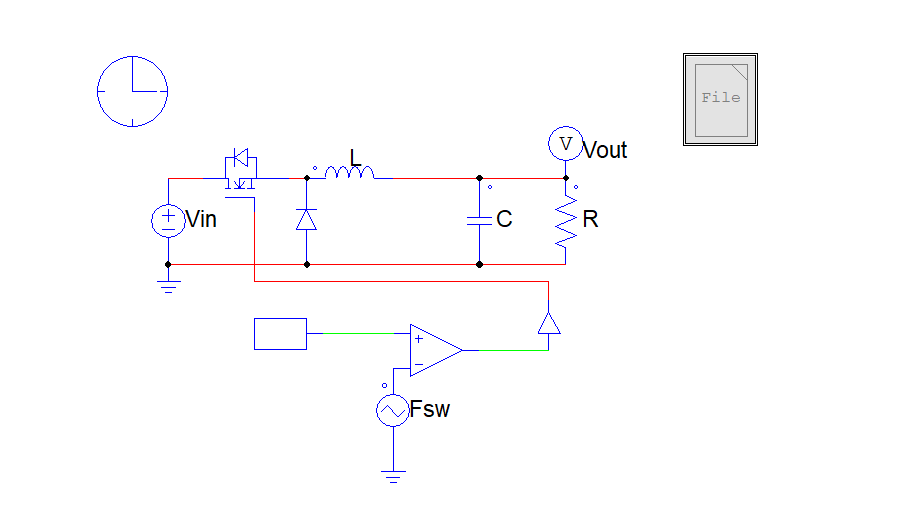
In this example, we will show how to change the parameters of a buck converter and create .smv files. Pay attention to the comments in the code.
First, create your circuit and define the parameters you need to control, using a parameter file (which must be disabled)
Next, open your file in Compose
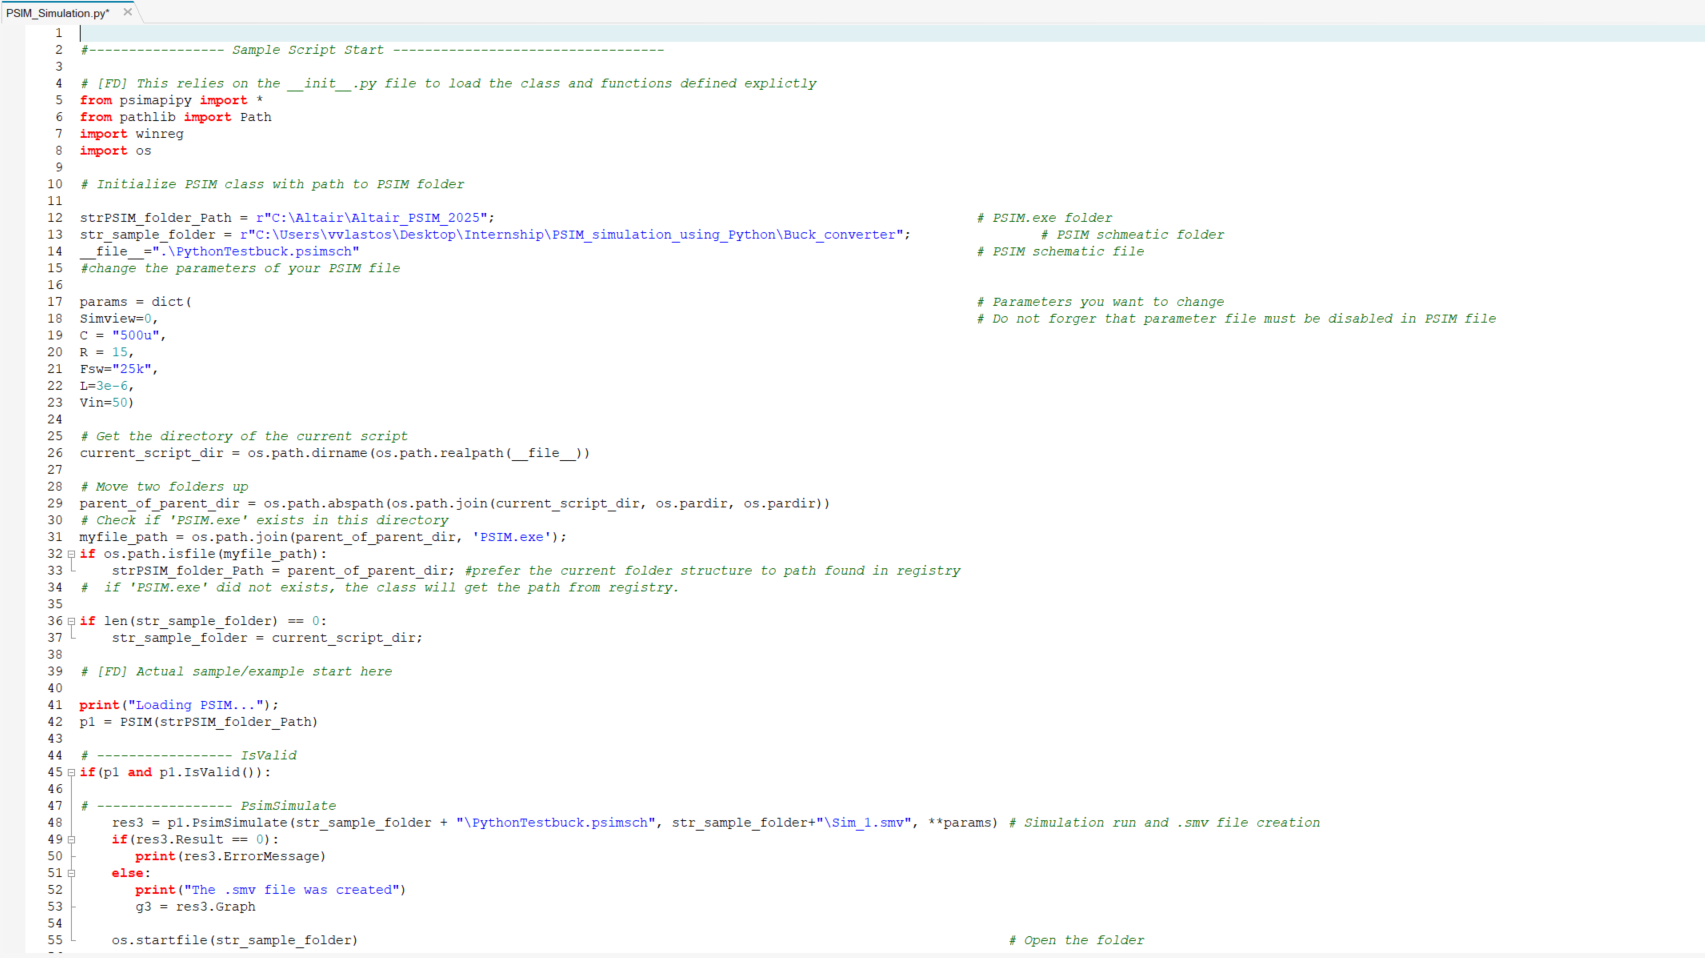
You have to define the directories where the PSIM files are located

At this piece of code, you can control the parameter variables of the PSIM schematic

When you run the script, the .smv file is created and its directory opens, allowing you to view the signals you have selected from your simulation.
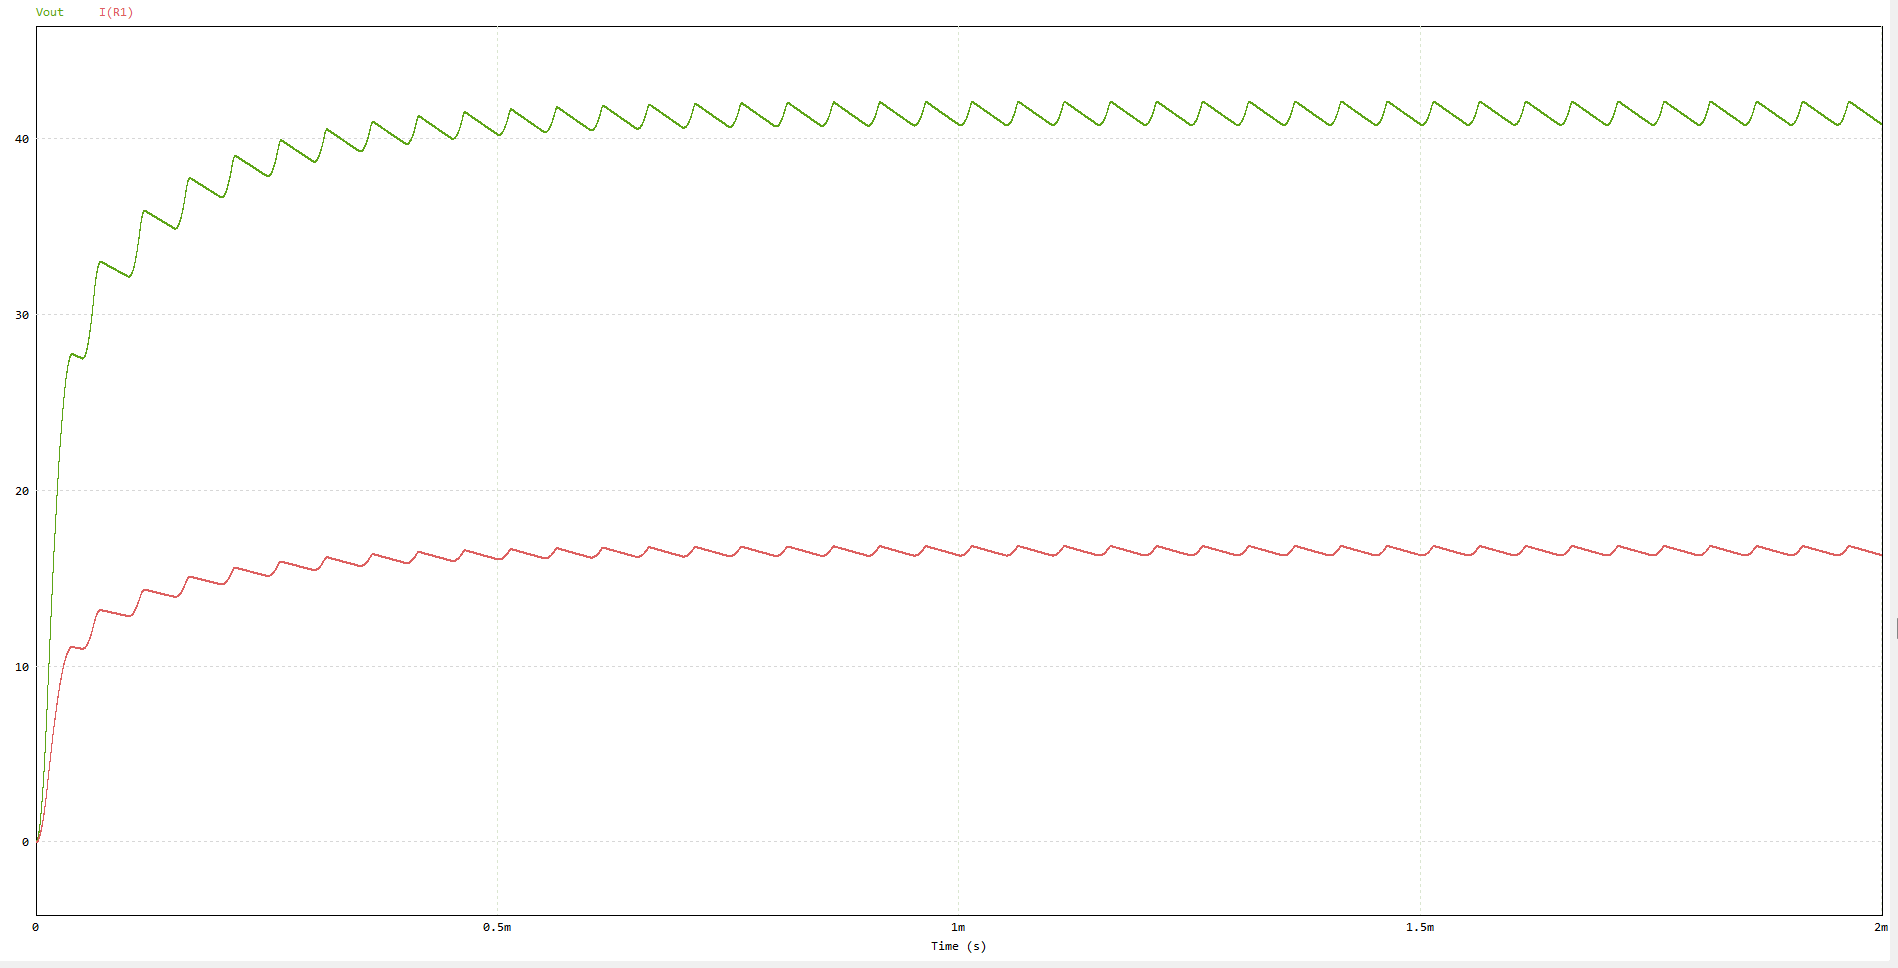
Furthermore, Python libraries can be used to post process results enabling new possibilities for plotting and post processing algorithms.
Α relevant article that demonstrates the differences between Hyperstudy and scripting be found here
All the needed files are attached here