The HyperStudy MotionSolve models allow to get access to the parameters (which can be retrieved in DataSets) defined directly in the mdl file:

User may want to define some parameters which are not directly in the mdl file, but in some include files called by the mdl file such as tire property file, …
In the sections below, we’ll look for us cases where all or part of the parameters are located in include files (tire property file, …). The default HyperStudy MotionSolve coupling is not able to read information in the include files, so the model set up in HyperStudy will be different from the standard one.
The three-wheeler model attached to the article will be used for the demonstration
Model pre-requisites:
For ease of set up, it is recommended to have both master and include files in the same directory.
Make sure in MotionSolve that all include files are defined with a relative path compared to the master file location.
To do so, from the Tools drop-down menu, select Options. In the pop-up, go to the Path Management section. Click on Convert all to relative, then Apply.
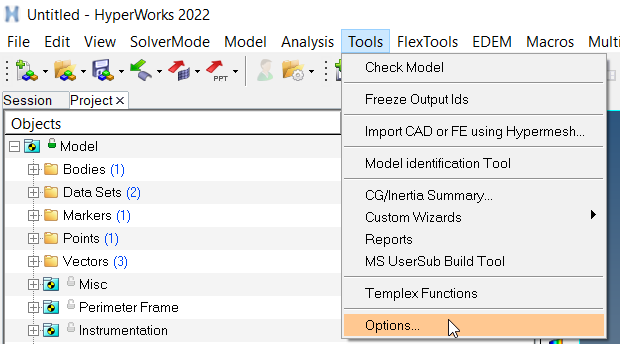
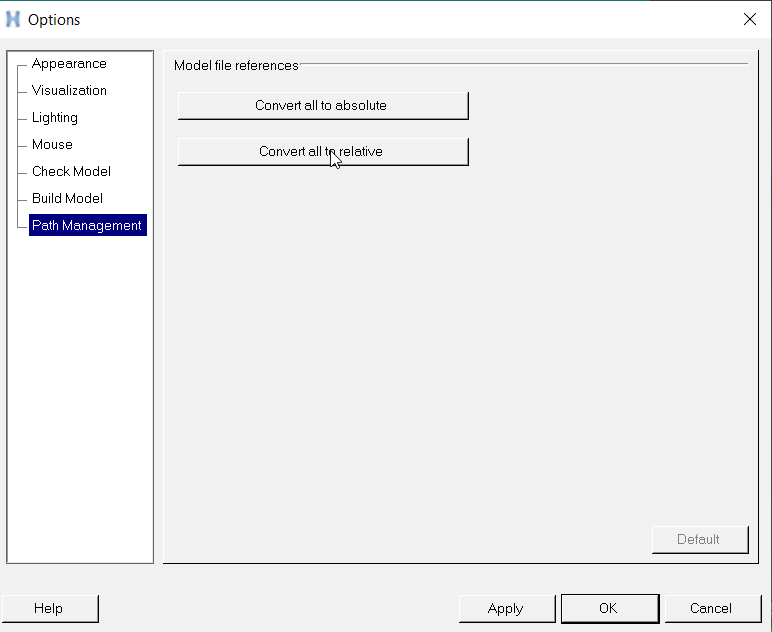
Make sure to save your model in order to get the paths updated in the mdl file
Use case #1: HyperStudy model set up if the parameters are only in one include file
Step 1: Parametrize the include file
In HyperStudy, create a new Study and chose as Study directory the directory whicnh contains the master input file.
Add a new model of type Parametrized File.
Click on the ABC icon in the Resource icon to select the include file (tpf file for this case). A pop-up will ask you if you want to parametrize this file. Answer Yes.

This will open the HyperStudy editor. Select with the right click the value you want to set as parameter, then right click -> Create Parameter.
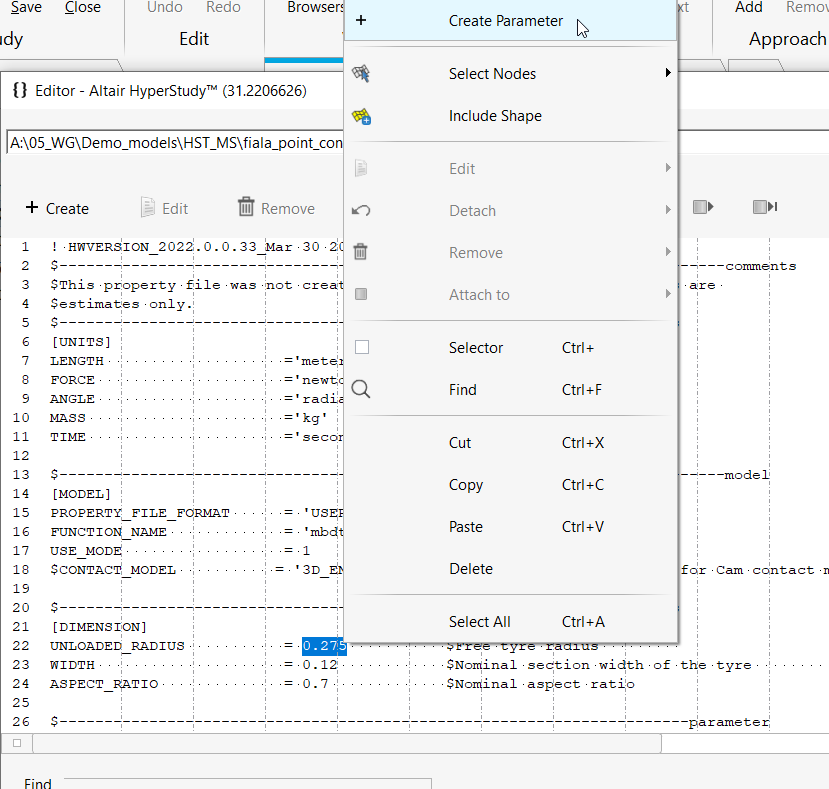
By default, HyperStudy pre-fills:
- both variable label (name exposed in the interface) and variable varname (inner code used by HyperStudy for background operations) If there is any text left to the selected value in the editor.
Otherwise, you can set yourself the label and varname, avoiding special characters and “.”. - lower and upper bound with a +/- 10% variation compared to the selected value
- output format: %5.3f means HyperStudy will write a floating number on 5 digit, with 3 decimals. Other possible formats are integer (%8i) or string (%10s).
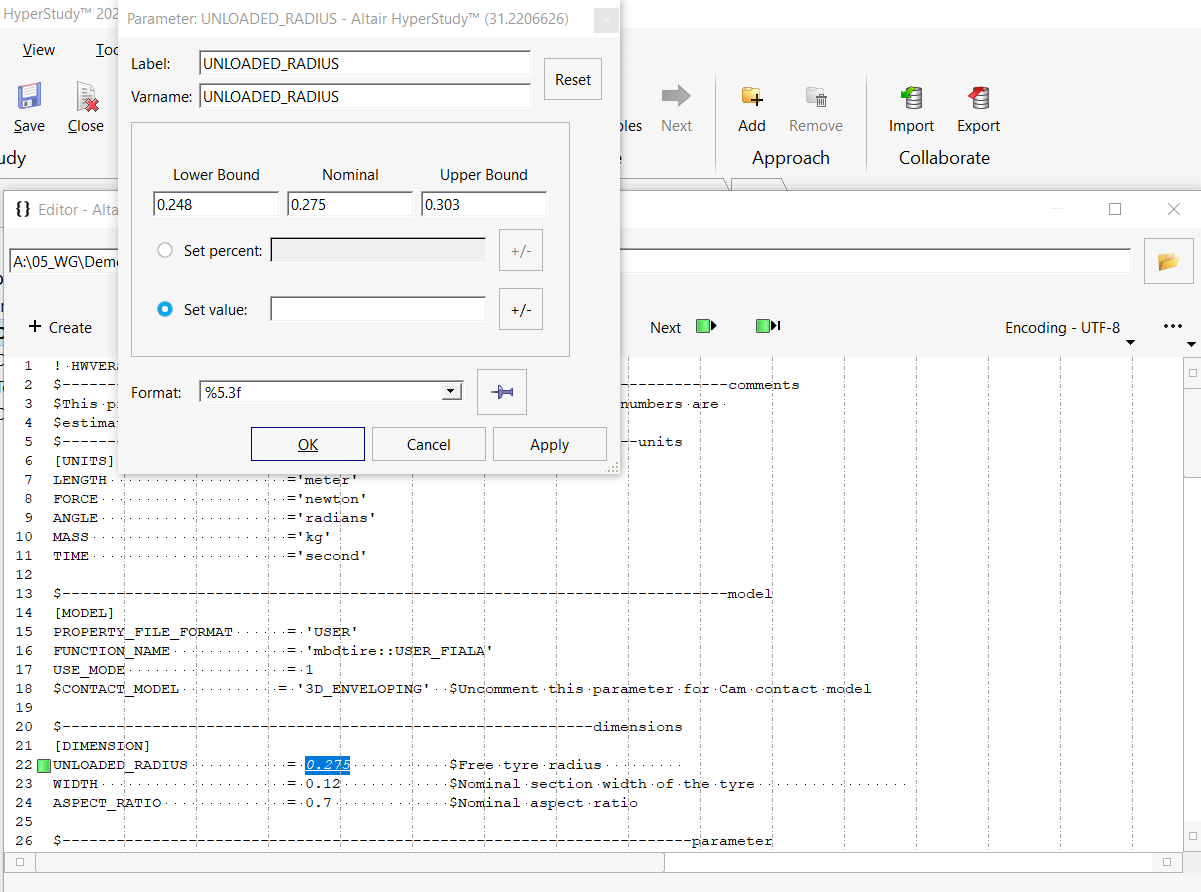
If you’re OK with the set-up, click on OK and repeat the operation for any other variable.
Please note that in the editor, all variables will be considered as continuous. You’ will be able to switch any variable to discrete states one back in the HyperStudy main interface.
Once all variables have been set up, click OK and Save. The parametrized file used Templex programmation code (Altair proprietary code) and is saved with .tpl extension.
Note that HyperStudy once saving the tpl file also populates the Output File column with the original name of the file.
Define the solver to MotionSolve and to define any relevant solver argument.

Step 2: call the master mdl file
Now the tpf file is parametrized, we have to say to HyperStudy how to copy the master mdl file for every evaluation.
To do so, click on the Model Resources button above the Model list.
In the pop-up, click on Parametrized File 1 (m_1), then right click -> Add Input File.
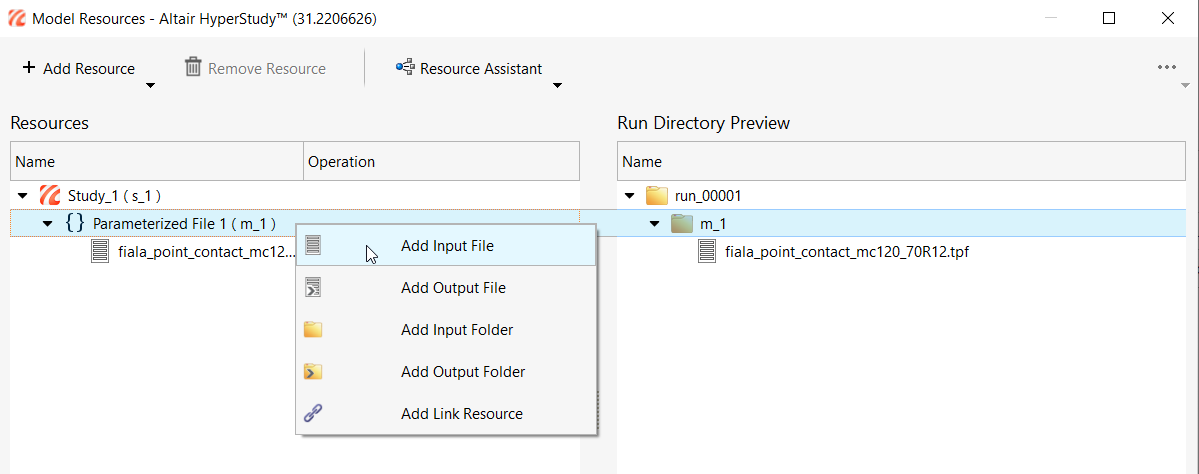
Select your mdl file. Then switch action from None to Copy.

Close the pop-up.
Once the model definition done, click on Import variables to bring variables within HyperStudy, then on Next to go to the Define Variables page.
Switch to the Modes tab if you want to set any of the variable as discrete.

Use case #2: HyperStudy model set up if the parameters are both in the master file and an include file
Review Use case #1 to see how to define the tpf file as a parametrized file. Swith solver to None for this first model.

For getting the study working directory, we need the tpf file from model 1 to be copied into model 2.
This require the models to be written in order to manage Model Resources:
- Import your variables and go to the Test Model section
- Click on Write for both models

Return to the Define Model section and click on Model Resource:
- Right click on Parametrized file 1 (m_1) -> Add Output file and select your tpf file

- Right click on MotionView 1 (m_2) - > Add Link resource and select the tpf file
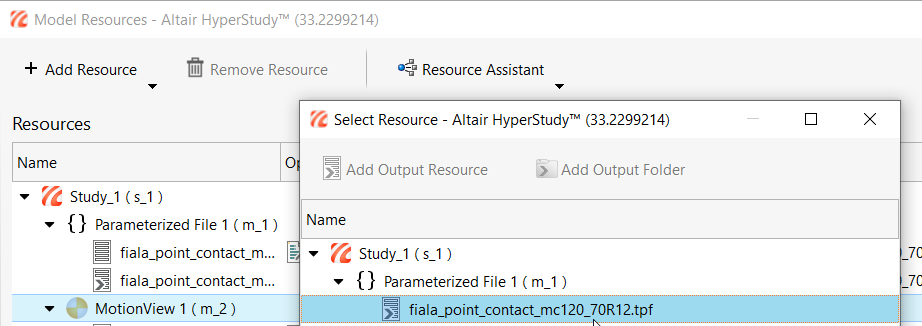
Once the link done, if you click on the tpf file under MotionView 1 (m_2), you should see a link displayed in the pop-up.

The set-up is now completed.